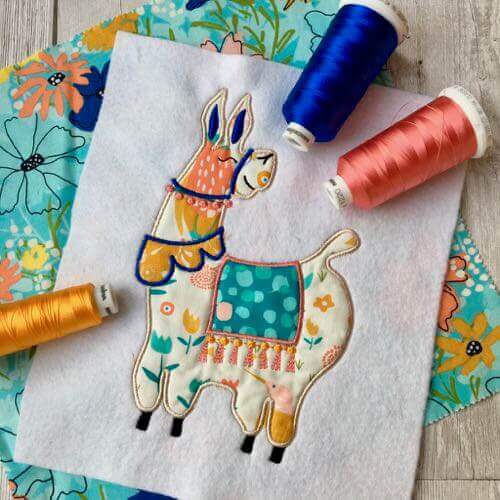
Applique may seem a difficult task to be done, but when you learn it, it becomes so easy. You enjoy doing applique, and it becomes fun for you. Here we will guide you step by step to applique on an embroidery machine to become very easy for you.

When you start your work, here is the first question which comes to mind.
What is an Embroidered Applique?
Applique is a technique in which one fabric material is attached to another fabric to create a new design. It is an ancient technique that is used to embellish clothes. The borders of the applique fabric are then decoratively secured by satin stitch. The satin stitch is sewn just right to another stitch. A satin stitch is best described as a filling stitch.
In applique, the top fabric is stitched with the bottom to fill the space. Instead of filling it with embroidery, applique is done. Applique does not only save thread but also creates a new trendy design.
Applique can be done by hand, or you can use your regular sewing machine, or an embroidery machine can be used for applique. Appliqueing done with an embroidery machine is much better in quality. It is quick and time-saving. Appliqueing makes the fabric lightweight as compared to fill it with thread which makes its thickness dense.
Types of applique:
There are three types of appliqueing :
- Hand applique
- Regular Machine applique
- Embroidery machine applique.
As we have earlier mentioned, embroidery machine applique is far better than any other technique as it gives better results and saves time. Here we will discuss applique by hand embroidery in detail to better understand it in detail.
Which material should be used for appliqueing:
Appliqueing can be done on so many materials. You can use cotton fabric, silk fabric, linen, or wool. It’s your choice, whatever you choose.
Things needed for Embroidery Machine Appliqueing:
- Applique pieces: you need to either buy them or hand-cut them.
- Background fabric: background fabric is that fabric where applique fabric is to attach.
- Interfacing: you can choose based on your personal preferences. You can take mesh, cutaway, tear-away, or anything.
- Needles
- Scissors
- Pins
- Thread
- Iron
- Fusible interfacing
- Adhesive sprays
Different styles of applique:
There are six different styles of applique.
Smooth edge applique:
Smooth edge applique is done for a tidy and neat look over the applique’s raw edges by using the machine.
Raw-edge applique:
In this technique, smaller projects can be done quickly. In this, we can easily attach tiny pieces of any cloth onto the more significant piece without finishing or turning the edges. With this, some delicate designs can be made without any particular effort by both hands or machines. This is a very efficient method as you can create designs in less time.
Multi-needle hoop applique:
If you want to create a larger hoop applique design using a machine, it is best to adopt this technique. The stitches are placed on an applique front, and the background fabric is also adjusted so that accurate stitches are made. When stitching is done, a beautiful design is created.
Reverse applique :
In reverse applique, both fabrics are layered together, and a motif is placed on it. After that, you cut away the remaining part of the fabric so that shape is revealed on the below material. The advantage of reverse applique is that it gives you a homemade feel.
Decorative stitch applique:
If you have a sewing machine, you can have decorative stitch applique. It is an experimental process but can give you good results.
Felt applique:
It felt applique the edging of don’t need to be finished or molded, so it is easy to applique.
How to Applique with an Embroidery Machine:
Embroidery machine applique is for those who want to have the applique in less time and want their project to end soon. By following the steps, you can be a master in applique by the embroidery machine of any brand Brother, Singer, or Janome, etc.
Here are the steps:
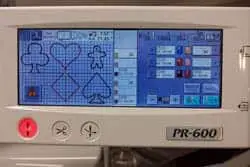
1. Loading
The embroidery machine has a small LCD, which helps understand different commands when you have some specific pattern from a built-in design. When you decide to applique, you must upload that design that gives you profit and is demandable. Once you have uploaded the design, you will not suffer any complication further.
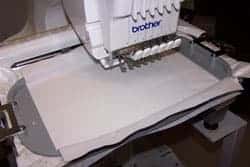
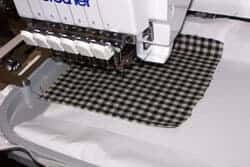
2. Hoop the material
When the design is uploaded, you have to come towards the hoop. Hoop gives you stabilization of the fabric. Whether your fabric is thick or thin, whether you are going to embroidery or applique, hooping is very important. Hoop holds the material, and you can do the applique smoothly.
Another step is to add another layer of stabilization between the bottom hoop and needle plate. It will save your fabric from any mishap, and you can work in peace. Hooping provides you a chance to work calmly and without any damages.
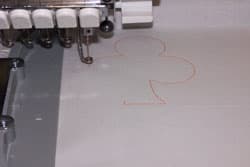
3. Outline
After hooping, the most crucial step is outlining the design. Whatever is the design, you have to make its outline for its accuracy and positioning. You can use any color for outlining because later, you have to fill it with applique. But one has to take care of the thread’s quality as it has to cover the outline, and it should be tidy and neat.
4. Fabric
As you are done with the outline, bring the fabric under the needle. Many of us face the problem of holding the material to an accurate position. For that, use sticky tapes or other sewing tools so that you make the right stitches on the outline. Use tacking stitches to tack the applique down.
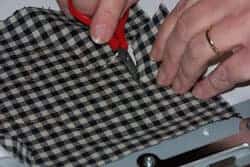
5. Cutting and trimming
Well-trimmed fabric and untidy fabric make extraordinary differences in your project. It makes a significant difference between a good one and a fantastic one. So while trimming and cutting, more care should be taken. Trimming should be done 1 to 2mm away from the stitching area. If you want to do satin stitches, you don’t need to cut closer to the stitch. For trimming, remove the hoop from the machine but don’t unhoop it all. Use sharp scissors or a cutter to cut the exact shape we have outlined earlier. We should make precise and accurate cutting. After cutting, you need to trim it cleanly so that final stitches can be made and no untidy edges are revealed.
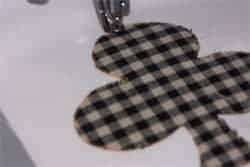
6. Final stitches
Before final stitching, you should be sure that your trimming is precise and up to mark. It should fulfill all professional requirements. For final stitching, you have to put the back hoop into the machine and push the start button so that machine starts working. To hide the stitches, you can choose the same color of thread as applique fabric. If you want to make your design decorative and prominent, you can use thread of different color but if you’re going to remain simple, then go with the same color as the fabric.
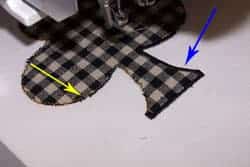
7. Securing
When you are sure you have done all things successfully and placed the fabric in the right place, you have to run one more stitching round. The final stitching will take more time to create a satin stitch all around the applique fabric. To secure the project, you have to run the machine one more time to maintain high and even quality. If you have done simple stitching in the first round, you can go with a decorative one in the second round. You can use contrasting color threads in the second round. At this point, your applique is done. You have done it successfully on your own. Now you can create your designs again and again by following all these techniques.
Tips and Techniques for Appliqueing :
- Preshrink your fabric before you’re going to do applique. It is imperative to do so because natural fibers such as cotton, satin wool, etc., usually shrink.
- The fabric chosen for the applique should be ironed
- Sharp scissors or cutter is required for precise cutting and trimming.
- Hooping is very important as it maintains stabilization. Place stabilizer under the applique fabric.
- Start your needle with the outer side of applique material.
- foot presser must be down.
- When it comes to adding applique on a shirt or any baby suit, make sure to use single layer of fabric in your hoop.
Conclusion:
Working with an embroidery machine may seem to be difficult, but in fact, it is effortless and less time-consuming. We may think it takes a lot of time to apply it with a machine. But in actual you can complete your project quickly and neatly with an applique machine. You can generate different designs with applique fabric. Embroidery machine allows you to have more fun and creativity with your task by making it easy for you.
