Tips and Tricks for Hand Embroidery
Although many embroiderers use embroidery hoops as a common tool, did you realize that you may also embroider without one? This article examines the skill of hand stitching without a hoop and provide advice on how to get excellent results. We’ll discuss alternatives to conventional
embroidery hoops as well as ways to showcase your final works of needlework art.
Can You Embroider Without A Hoop?
If you are looking for ways to avoid embroidery hoops … read on!
Pros and Cons of Embroidering Without a Hoop
Embroidery without a hoop can be more flexible and liberating for the stitcher. The stitcher can easily shift their embroidered project around and work on objects with irregular shapes, such cuffs or collars, without the restrictions of a hoop. Also, using a hoop can occasionally produce creases or marks on cloth that can be prevented by not using one. But, if the cloth is not properly supported, embroidering without a hoop may cause fabric deformation or unequal tension.
The project might also be more challenging to keep uniform stitch tension.
If you cannot find a suitable hoop easily then you can embroider without one.
It’s very important to maintain reasonably good tension on your fabric. This prevents the fabric from being distorted. And, instead of using your hands, you can use a scroll fabric instead. A fabric scroll works very similar to a hoop.
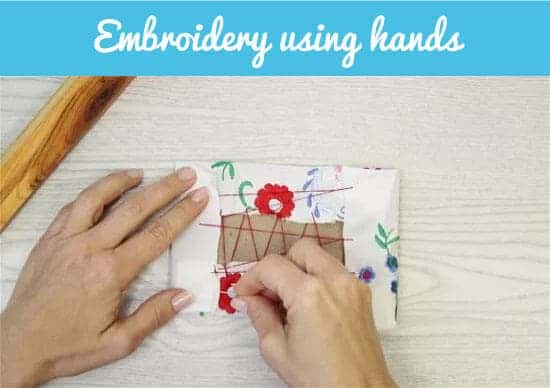
Also, some people only use their hands by keeping the fabric between theirs fingers and thumb embroider using your hands. You then extend it as you stitch to sustain the pressure in the fabric (and minimize damage).
Most people who do use their hands only, if you are using them for the first time, will have sore finegers—just be aware of this. Obviously, its only temporary. The more you embroider without using a hoop the more your fingers will get used to it.
Embroidering by hand (without a hoop) is harder to do but with practice you can master it.
What you need to know for embroidering without a hoop.
Stabilizing the fabric is crucial, so you’ll need a stabilizer like fusible interfacing or embroidery stabilizer. Thread tension can also be a concern, so it’s essential to use a high-quality thread and needles appropriate for your fabric. If you’re working on a larger project, you may want to consider securing the fabric to a table or using a bar clamp to keep it taut.
Embroidering without a hoop requires proper stabilization and tension techniques to achieve an even result. Here are some tips and techniques to keep in mind:
- Use a stabilizer to prevent fabric from stretching or distorting
- Work in small sections to maintain tension
- Keep a consistent stitch length and tension
- Use high-quality thread and needles appropriate for the fabric
- Secure fabric to a table or use a bar clamp for larger projects
How to Embroider without a Hoop?
By following these tips and techniques, embroidering without a hoop can be a successful and enjoyable experience.
1. Hand Embroidery Stitches
Some people are worried that using hands can make your work less attractive compared to working with a hoop. This is, of course, a myth.
For most projects—if you do know how to embroider using hands, and are practiced at it—your work will appear far better!
Hand embroidery stitches are the foundation of any embroidery project. Each stitch has a unique visual effect and texture, making it important to select the right stitch for your project. In this section, we will provide a brief introduction to hand embroidery stitches, go over some common types of stitches, provide tips for achieving good stitch tension and discuss how to customize your hand embroidery stitches.
Hand embroidery is the craft of decorating fabric or other materials with needle and thread. The stitches used in hand embroidery can be simple or complex, and can add texture and dimension to a project. Before selecting a stitch, it’s important to consider what effect you want to achieve and what materials you will be using.
Great Place to Start: Embroidery on a Patch
You can always first try hand embroidery on a patch. This step-by-step approach will help you to embroider using your hands.
First, Mark your fabric. Before starting, mark your piece of cloth where the stitching will be done.
Next, Start stitching. There is nothing unusual in hand embroidery—you can simply start stitching.
You should keep in mind that the amount of tension applied must be appropriate at all times.
Finally, Steam blocking. The stitched area will appear to be tight compared to unstitched areas.
To alleviate this, gently steam the fabric’s backside using an iron.
Let it cool and repeat the process until your stitching is complete.
Common Types of Stitches Used in Hand Embroidery
- Satin Stitch: used to fill in large areas with smooth, even stitches
- Back Stitch: used for outlining and creating crisp, solid lines
- French Knot: used to create raised dots or textured accents
- Chain Stitch: used for creating lines or filling in areas with a textured, looping effect
Achieving Good Stitch Tension
Achieving good stitch tension is important for creating a well-executed embroidery project. Here are some tips for maintaining good stitch tension:
- Keep your thread taut but not too tight
- Use a smaller stitch length for finer details
- Practice your stitches on a scrap piece of fabric before starting your project
- Use a stabilizer or interfacing to prevent your fabric from stretching or warping
Customizing Your Hand Embroidery Stitches
Once you have mastered the basics of hand embroidery stitches, there are countless ways to customize and experiment with your stitches. Here are some ideas for customizing your hand embroidery stitches:
- Experiment with different thread textures and weights to create unique effects
- Combine stitches to create new patterns and shapes
- Add embellishments like beads or sequins for extra texture
- Use different colors of thread to create depth and dimension
If you’re looking for alternatives to embroidery hoops, there are several options available. While hoops are a traditional and useful tool for holding fabric taut, they may not be the best option for every project or embroiderer. In this section, we’ll explore different types of embroidery frames and creative alternatives that you can use to hold your fabric for embroidery.
Different Types of Embroidery Frames
Embroidery frames are available in a variety of styles, materials and sizes. Here are some of the most common types of embroidery frames:
- Traditional Embroidery Hoops: Wooden embroidery hoops are the most commonly used type of hoop. They have an inner and outer ring that can be adjusted to hold the fabric taut. Plastic embroidery hoops are also available, but they may not be as durable as wooden ones.
- Scroll Frames: Scroll frames are made of wood or plastic and consist of two bars that are attached to the top and bottom of the fabric. The fabric is rolled around the bars, which can be adjusted for tension. Scroll frames are often used for large or long-term embroidery projects.
- Lap Stands: Lap stands sit on your lap or a table and consist of a frame and a stand. The frame holds the fabric taut and can be adjusted for tension, while the stand keeps the frame in place. Lap stands are a great option for embroiderers who prefer to work without a hoop.
2. Using fabric scroll frames
If you don’t want to use your hands, you can always use a fabric scroll frame. Scroll frames for needlepoint are very helpful to maintain the appropriate tension needed during embroidery. Since it is hands-free, you’ll find that it will also be less tiring!
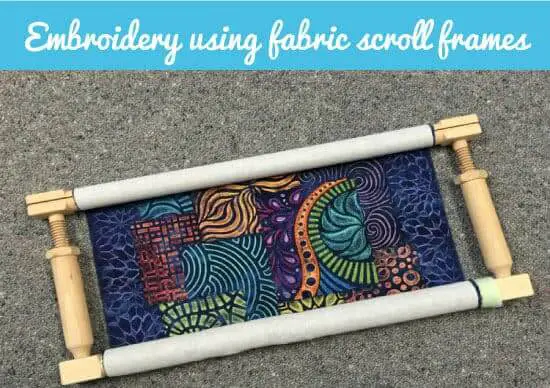
Most models of the scroll frames are adjustable, and they come in tabletop or standing designs too. The embroidery process is still the same when a scroll frame is used. The only difference is that you are using a scroll frame instead of a hoop.
3. Applying fusible interfacing material to the back of the fabric
Using a hoop can create a host of problems, so most people apply fusible interfacing to the fabric’s backside. This will help the fabric remain the same, neither overstretched nor under stretched.
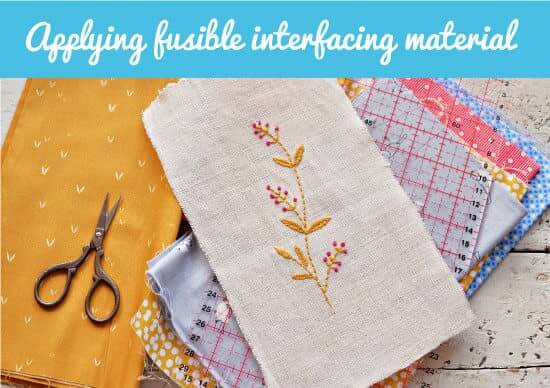
When this method is applied, the sheet of fabric gets a little heavier and thicker. It is best for intensive needlework as ending and starting the thread becomes very easy. Thanks to the second backing layer of the hoop that made this possible. This method also prevents your fabric from fraying as well.
However, there are some drawbacks. If the thread is pulled tightly, the fabric may become damaged (or pucker). Be gentle when handling it. If the fabric is held too hard in your fist, it will crumble, and then even ironing it won’t be possible at all.
Last Minute Tips before we look Machine Embroidery without a Hoop
Embroidering Without a Frame
Embroidering without a frame can be challenging, but it is possible. Here are some tips for embroidering without a frame:
- Use your non-dominant hand: Hold the fabric taut with your non-dominant hand while embroidering with your dominant hand.
- Support your fabric: Rest your fabric on a flat surface, like a table or clipboard, to keep it from shifting while you embroider.
- Use shorter lengths of embroidery floss: Shorter lengths of embroidery floss can help prevent tangling and keep your stitches neat, even without a hoop.
Creative Options for Embroidery Frames
If you’re feeling creative, there are several unconventional options you can use as embroidery frames:
- Household Supplies: You can use everyday household supplies, like oven mitts, embroidery floss skeins, and hangers, as embroidery hoops. Be creative and try out different materials to find what works best for your project.
- Custom Frames: You can make your own custom embroidery frames using PVC pipe, wooden dowels, or even wire. Custom frames are a great option for embroiderers who want to work on unique shapes or larger projects that won’t fit in a traditional hoop.
- Everyday Objects: Everyday objects, like canning lids, picture frames, and clock faces, can be turned into unique embroidery frame options. With a little creativity, the possibilities are endless!
Machine Embroidery without a Hoop:
Most modern embroidery machines come with the hoops that are included as accessories. This can help you create an even amount of tension on the fabric and prevents it from wrinkling.
But, if you want to embroider without a hoop you can still create effective designs with great stitching quality. Just find a method that creates an equal amount of tension in the fabric similar to the scroll frames discussed earlier.
The scroll fabric plays an effective role in maintaining the fabric’s tension, and it enables you to confidently without worrying about the puckering of the cloth.
What is an Embroidery Hoop?
An embroidery hoop is a structure that includes a pair of circular or elliptical coaxial rings. It holds the cloth to provide comfort while sewing the lace in the fabric. Embroidery hoops are also known as tambour frames (click this link to get a selection of ideas on amazon.com).
Back in 1700, the tambour hoops were widely used for laces. As time passed, annotations were made into this tambour structure. Gradually, it was converted to what is now commonly known as an embroidery hoop.
The main thing that difference is the material. Previously, metals, bones and ivory was used, whereas today you only find plastic and wood mostly.
Why is an Embroidery Hoop mostly avoided?
The wrong hoop can damage your fabric and the stitches as well. And, if you need to embroider on a tiny area like the collar of a shirt, the hoop cannot be used—since the hoop will not fit in this difficult area. Similarly, if the embroidery project includes a fabric with an uneven surface, it will not fit into a hoop frame.
What is an Embroidery Hoop used for?
The hoop is where you put your fabric to maintain stability while you’re stitching—its role is to keep the fabric tight.
While moving along the stitch, the hoop is will prevent your fabric from getting damaged.
A common substitute for this embroidery hoop is the DIY hoop that can be created with recycled materials. You could make this from a throw-away plastic container.
Difficulties in using an Embroidery Hoop.
The tricky part is attaching the fabric with the hoop. This is because you must know how tight or loose the attachment should be.
Follow these steps:
Prepare your hoop– you should focus on the size you need for the embroidery and find a suitable hoop accordingly.
Loosen the hoop– a metallic screw opening is present to adjust the hoop. Be careful because this screw may be made of plastic. After unscrewing the screw, get rid of the hoop.
Place the fabric– an inner ring of the embroidery hoop is the perfect spot for your fabric. Make sure that the fabric is well spread.
Fix the outer ring– the fabric should overlap all dimensions of the hoop. You should maintain the position of the fabric while tightening the screw. In the end, close the ring but make sure that the fabric is well spread and is intact.
Secure the fabric in place– the final check is to adjust the final tightness. To avoid hoop marks while stitching, it should not be too tight. On the other hand, it should not be too loose to prevent crumpling of the fabric.
After all these steps are carried out, you can start now with your embroidery. This was a detailed guide for attaching the fabric to the hoop. If you want to skip this time-consuming process, you should avoid using a hoop. Because, the worst part is that success is not guaranteed—even after following all these steps—if you are a first-timer. Therefore, you may want to consider other options.
Conclusion
If you have read all the details mentioned in this guide carefully, you will be sure by now that using a hoop is not an easy task. Most people still want to use it because of the perfection that it provides.
On the other hand, some people prefer hoop less embroidery to avoid all the difficulties in handling it.
All these methods have their pros and cons. You can now embroider using several methods according to your choice. Depending on the type of embroidery you are doing, your selection may vary. Sometimes, several embroideries are not possible without a hoop like needlework.