Embroidered shirts not only give you a stylish look but also enhance the charm of your personality. Currently, stores are full of embroidered shirts, and it has become a fashion to wear these types of outfits. If you work on correct preparation, it’s not challenging to embroider a shirt or any other clothes at home.
However, it is difficult to embroider on a woven T-shirt or Sweatshirt because the design might become inaccurate due to stretchy fabric. On the other hand, the stabilizer resolves this issue.
Also, you can create embellished embroidery on any shirt (including T-Shirts and Sweatshirts), making small and big designs. Both types of designs are perfect methods to distinguish your outfits, and the best thing is that you can utilize them as gifts.
While doing embroidery on knit materials, the flexibility of the cloth would create difficulty for your stitches. Also, the completed piece of embroidery would appear very inaccurate and distorted.
Fortunately, you can fix that problem as well. Just use a particular stabilizer on your flexible outfit. In this way, you might create your design with excellent outcomes.
In this article, we’ll guide you on how to embroider a shirt to escape you from hassle in 7 steps.
How to Embroider a Shirt
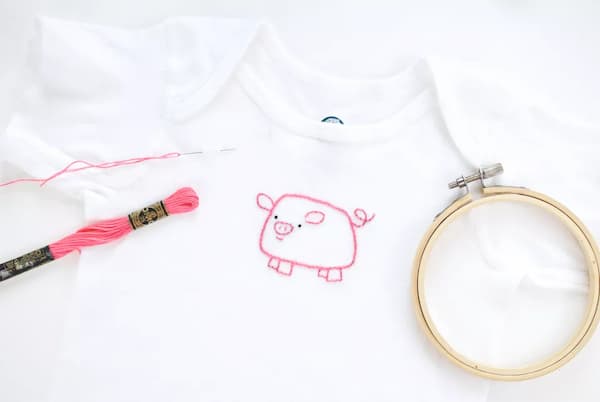
Required Things:
- Embroidery hoop
- Stabilizer
- Needle (the round end is ideal)
- Embroidery floss
- Iron
The pattern would support you to identify the settlement of the design, sew it out on 2 sheets of stabilizer. Shape up the pattern and place it in the spot to check size, position, and yarn color choice.
1. Discover the Midpoint
Discover the midpoint of the shirt and make a horizontal streak. Now, check where the joint of the shoulder comes across the neckline & mark a vertical streak. The capturing point is the midpoint of your embroidery project.
Every time check the textile marker on your fabric before practicing it. On shadowy materials, use the white textile marker, which makes it easy to iron. Moreover, you might use pins to draw the vertical & horizontal streaks.
2. Apply a Stabilizer
To embroider a shirt, you need to apply a cutaway stabilizer under the woven fabric. You have no other choice as the stabilizer works like a base of the embroidery, and the fabric doesn’t get stretched.
On the contrary, if you don’t use a cutaway stabilizer, the stitches of your embroidery might break down, plus the design might become inaccurate.
We suggest you choose a net cutaway stabilizer for delicate skin. Gently spray the 505 stabilizer adhesive on the stabilizer to provide your shirt somewhat to stick on.
3. Use Ballpoint Needle
You need to shift to ballpoint needles from embroidery needles to work on woven cloth. Ballpoint needles don’t cut the subtle knit of the stuff; however, they pass over the knit easily.
However, if the ballpoint needles aren’t in your existing needle equipment, a Universal needle would function as an excellent instant option. The stretch needle is the best needle to work on the shirts extremely prepared with Lycra.
4. Apply Floating Technique
No need to hoop a shirt again & again to make it straight; always apply the “floating” technique for immediate flawless settlement. Move your needle to the midpoint of the embroidery pattern.
Then, place your T-shirt above the gently 505 sprayed hoop, line up the needle to the streaked middle point on the shirt.
If something gets incorrect, you are sure that the pattern has not ever relocated from the center of the hoop.
5. Use Water-Soluble Stabilizer
We highly recommend using 1 sheet of a water-soluble stabilizer above the uppermost of the T-shirts. It provides the design a boost as well as saves it from dripping down into the cloth.
6. Trim the Cutaway Stabilizer
Put the shirt amid you & the scissors, shape up the cutaway stabilizer from ¼ inches to ½ inches from the external edge of the pattern. Make sure not to cut any parts or curves of the design. Leave the big piece of stabilizer under the shirt.
7. Finishing Touch
Currently, you have completed the task to embroider a shirt. So, iron your accomplished embroidery design gently from the reverse side to plane out the creases & eliminate hoop lines.
It would give a final touch to your shirt, which you embellished with a beautifully embroidered design. Your T-shirt is all set to wear.
On the upper side of the shirt, the water-soluble stabilizer is commonly pricked in embroidery practice. Just wrench it away from your embroidery.
I am giving you a tip to take out the trivial leftover parts of the water-soluble stabilizer. Or else, it would ultimately come out once as it washes away.
Tip to Take out the Remaining Water Soluble Stabilizer
Place a damp paper towel on the embroidery part. Touch the hot iron to the wet paper towel. The hotness of the iron would produce steam to warm up and take the remaining water-soluble stabilizer out from the upper side of the cloth.
Move the hot iron over the embroidered design until all of it vanishes.