Something trendy and fashionable? It has never been easier to custom-designe your hats!
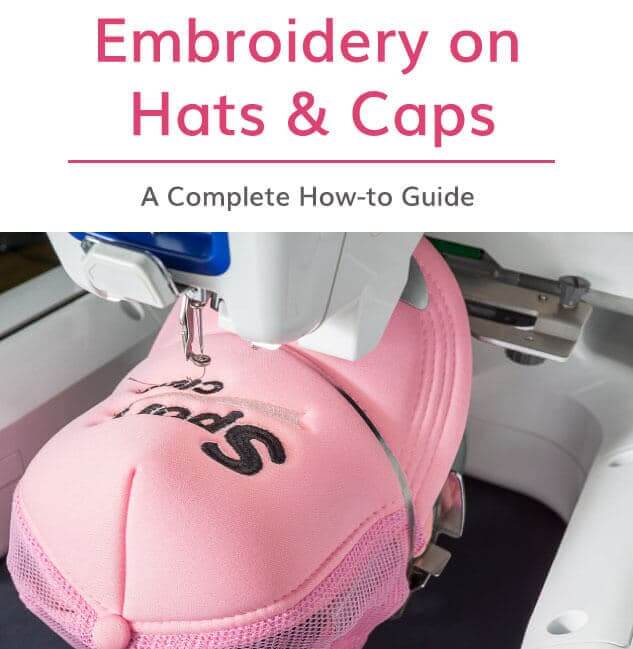
Whether it’s your business or your hobby—this how to guide hopes to teach you some of the techniques necessary for embroidery on hats and caps. Generally, it may look simple to design a cap, but there are actually a lot of considerations we need to consider. There is no specific embroidery that is done on beanies or hats other than any other fabric.
Let’s discuss how to choose different hats, proper placement and stabilization.
To do this well, you should know different techniques for embroidery, such as hand embroidery and machine embroidery (we have articles on these topics). Also, what we should do to get the best embroidery result—and how to make it appealing—is crucial to know which techniques to adopt.
Choose your Hat or Cap for Embroidery :
There are hundreds and thousands of choices regarding the color combination, back closure, crown style, material selection, and so many things when you look in the catalog. There are a wide variety of caps available, but generally, there are three categories
1:OPF (One-piece front) hats
2:Varsity/collegiate hats
3:Sports caps
1. OPF (One-piece front) hats
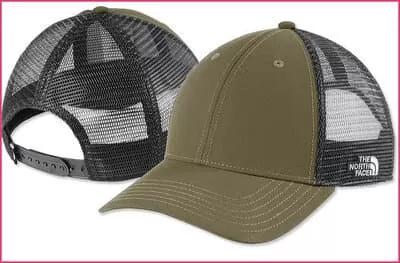
OPF is usually categorized for farmer’s and truck driver’s hats. These hats have a backing of laminated foam, and the rest of the hat is made up of mesh material. Mesh material is typically made of nylon or polyester. Mesh is also water-resistant, so that’s why this hat is categorized as farmers’ and truckers’ hats. These hats are usually pretty and easy to hoop. These are easy to embroidery because of their laminated back. The hat has no seam in its center.
2. Varsity/collegiate hats
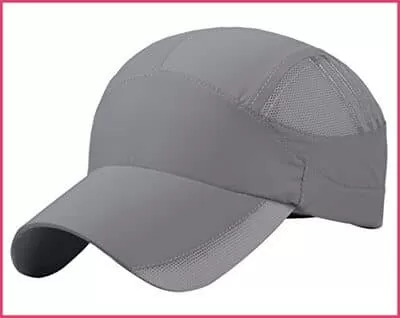
Varsity hats are always focused on innovating the perfect hats. These hats are closed to the head, so it is essential that hooping is done properly. Another thing to consider is that these hats don’t have laminated backing on the front panel.

3. Sports caps
Sports hats are the most popular hat design, especially for embroidery. Sports caps are used for outdoor and indoor activities. The baseball curved provides shadow to the face and protecting it’s wearer from sunlight. The hat has a center seam down the middle of the front panel and laminated backing. And, generally, stitches are made on the center seam of the front panel.
Types of Hat Embroidery:
When you are going to embroidery a hat, there are many things to consider about the proper placement and hoop size. There are two different ways to embroidery your hat. Either you can hand embroidery it, or you can use embroidery machines.
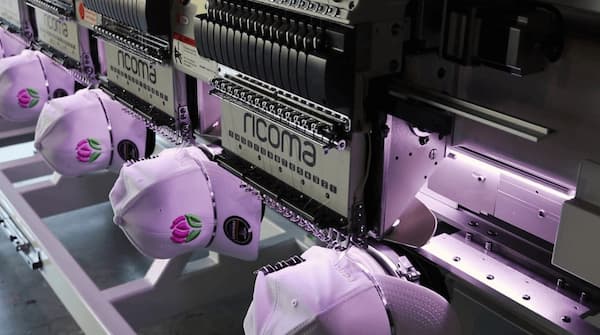
There are many embroidery machines on the market that bring ease of use, quality, and speed at the same time.
Hat Embroidery with a machine takes less time and less effort. Most multi needles embroidery machines can handle almost all sides of the cap from the front side, backside, and spaces.
Mostly of the embroidery is done on the front side of the cap. Even the most basic frames are designed be applied to the front side. But now, for commercial use, wide-angle cap frames are designed to cover almost all sides of the cap, front side, backside, and both sides. Most of the caps or baseball caps are embroidered before stitching. Because it is not easy to embroider after the cap is stitched.
Lets first talk about machine embroidery.
How to Embroider Hats with an Embroidery Machine?
1. Machine Embroidering the Front and Center of the Hat
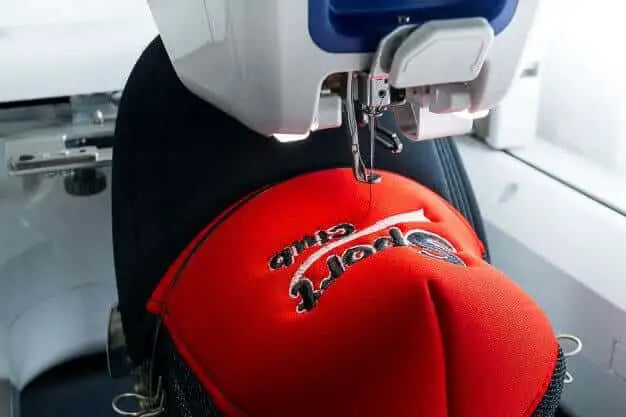
The front of the hat is a more critical part of embroidery, as I discussed earlier. Most of the frames are designed to cover the front side. The most crucial variant is whether the front part is structured or not. Buckram is used to stabilize the front side of the cap. Fused buckram helps the crown to stand firmly. It gives shape and firmness to the hat.
Unstructured caps don’t have this and will tend to be floppy. For an unstructured cap, it is necessary to provide the backing. Cap backing is stiff and provides firmness and stabilization to the hat. You can also use soft buckram backing. While doing placement on structured caps, it is not necessary to place the back clip-on wide-angled frame.
Experts don’t recommend using a back clip for large design frames. It gives little flexibility to the cap and prevents distortions at the top design of the cap.
2. Embroidering The Side Of Hats Using A Machine
Back clips are used for side placement. The back clips are designed for side placement. There are a variety of wide-angle frames. The only difference is the back clip.
Some wide-angle frames have one large clip or one on each side of the back.
Some brands use multiples clips. When doing side placement on caps, it is mandatory to use side clips; otherwise, the design will not look up to the mark.
As back caping may be optional for front placement, but it is necessary for back placement as there is no fused buckram on the sides of the cap, so it must be stabilized. For mesh cap and single twirl cap, a single piece of back capping will work well. The purpose of backing is to provide the necessary material to hold stitches together. It is also possible to sew on a mesh cap with proper stabilization.
A problem encountered while hooping the cap is to keep the backing in place. It’s because the frame does not support the backing, and it falls off while it’s removed from the framing device. You can solve this problem by using double-sided tape on the side of the framing device. To use the tape, peel the backing paper and stick it into the tape. This will help prevent the backing paper from falling, and the cap can be hooped easily, after which this can be peeled off from the frame easily.
3. Embroidering The Back Of Hats Using A Machinery
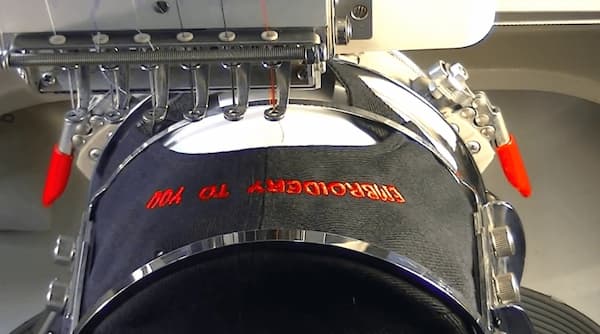
For placement on the back of the hat, most machines come with a 12cm 0r 4.5 round hoop, which is the perfect size to fit the cap’s back. There are so many attachments available in the market for back placement as back placement is very straightforward.
You can use a conventional round hoop for back placement, eliminating any special placement devices’ need.
For placement, you have to align the hat first.use some marks to align it. The center seam should be aligned between 6 and 12 o’ clock. The edge should be aligned with some other marks. The cap back should cover the whole hoop to provide the best stabilization.
How to Hoop for Hat Embroidery
To start embroidery or monogram on a hat, proper hooping is needed and can be difficult at first. Whether you are new to hat embroidery, or an expert, you have to learn these techniques. One of the main reason embroidery hat projects fail is from unclear hooping. You must follow some steps to ensure that your hooping is perfect. Before you start, lets discuss hooping accessories.
There are three main components of hooping accessories:
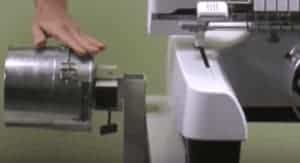
Driver: The driver fits on the top of the arm of the machine.

Cap frame: The hat will attach to the cap frame
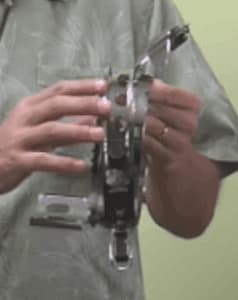
Jig: The purpose of the jig is to attach cap frames for proper hooping.
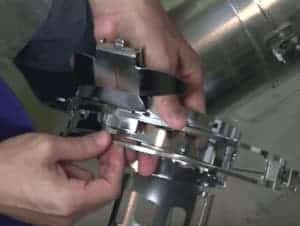
Step 1
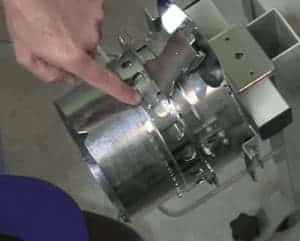
Firstly, you should be sure your frame is properly secured to the jig, and this can be checked because a clicking sound will be heard when it is in place, and there will be no space for it to move.
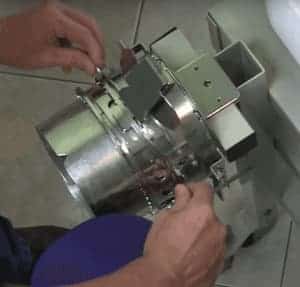
Step 2
In the next step, the cap frame should be in position for a hat.
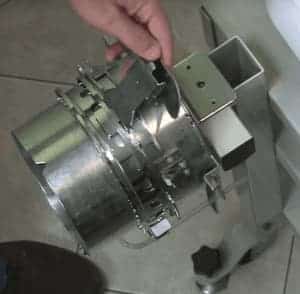
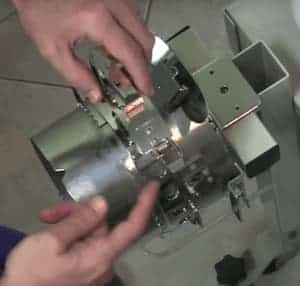
Step 3
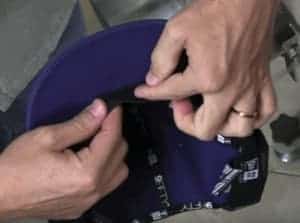
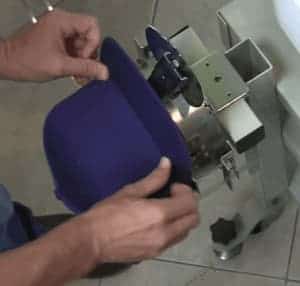
When the jig is ready for hooping, we have to prepare the hat itself. For this purpose, move the band present on the inside of the band to the side, which will hinder the process. The band will be placed below the plate on the jig. It’s essential to align the red line to the center seam. When the band is securely in place, now make sure to secure the cap frame such that the teeth of the band are in line with the base of the cap.
Step 4
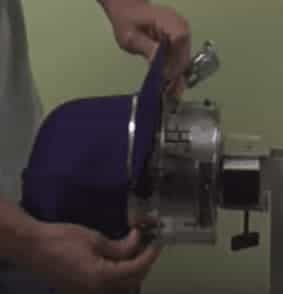
Firstly, you should be sure your frame is properly secured to the jig, and this can be checked because a clicking sound will be heard when it is in place, and there will be no space for it to move.
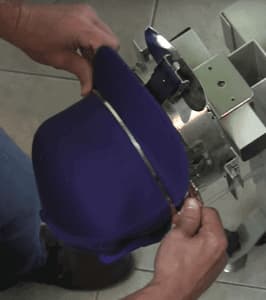
Step 5
In the next step, the cap frame should be in position for a hat.
Step 6
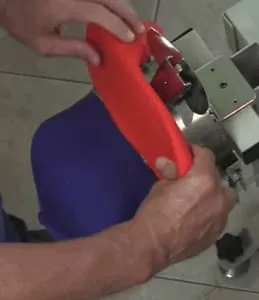
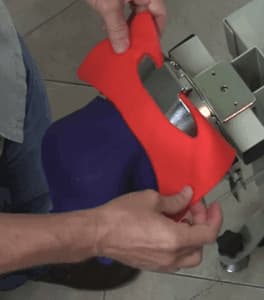
After it is done, push the strap down to lock it.
Step 7
The last step is to place the material over the peak of the hat. After that, engross the peak mount so that the peak would not interfere while the cap is embroidered.
How to digitize design?
You have to start from the bottom of the cap up to the crown; otherwise, your stitches will become uneven, and you will get poor results. Similarly, start digitizing inside out, ensuring no improper stitching. While digitizing, you have to consider so many things, such as fixing embroidery or fixing underlying stains, or covering any other problems.
Which embroidery digitizing software should be used?
Hatch embroidery software (this link will open in a new window and gives you several examples on Amazon.com depending on your machine) is the best place way to go for home embroidery. It has multiple features, easy to use, and is usually price-friendly. As a recommendation, use the inside-out feature. This feature will automatically create your design and prevent buckling.
Can a single needle machine be used for embroidering a hat?
If you don’t have a multi-needle machine, you can still embroidery your cap with a single needle machine—you can also use custom embroidered patches for hats.
Hand Embroidery for Hats / Caps
Patience Required. The cost of embroidering the hat by the hand is significantly less as compared to machine embroidery. Just with a bit of practice, anyone can master this skill with ease. At first, it might take hours and several sittings, but once you are proficient in it, you might be able to do it in a few sittings. A small design may take around three hours, while a complex design may take about seven to ten hours.

A list of items given below is essential to start doing hand embroidery:
- Embroidery hoop, scissors, floss, needles, liquid seam sealant, and the fabric for embroidery.
- Hand embroidery thread of 6 strand thickness should be present.
- A needle is needed with a skinny eye, through which a thread of 3 strand thickness can pass easily.
- Crafting foam of any color, even different from the thread, is needed. The thickness of the foam should be 3mm.
- A thread locker is required to secure the thread over the cap.
Now the process is explained stepwise below;
Choose a design:
Choose the design which you want to makeover your cap. For beginners, start with a simple design.
Draw the Design:
Print the design or draw it yourself over sketch paper. Now perforate the paper on the foam around the outline of the design by using a knife. Remove the excess bit of the foam with the knife.
Start embroidery:
To make the threads look smoother and flat, you can separate the threads and recombine them. However, this is not a necessary step. Start the embroidery with the simplest section, then move to the next. Take a single stitch and pin down aesthetically around the design. Stitch the dress between different parts of the design to cover the foam completely. It’s important to stitch the design in one direction, either from top to bottom or right to left. Mixing the design will make it look strange. As a beginner, you might leave gaps while doing the embroidery. This can be avoided by using an alternating weave.
Finalizing:
When you are near to completion, check for those areas which need trimming and locking loose threads. Use a liquid seam sealant on the lumps of thread to prevent it from fraying and make it more firm. It will take around 30 minutes for the sealant to dry. It might not smell good while it is still wet. But once it dries, the threads will be firm and not loose, and they will tolerate anything.
If foaming parts are visible around the thread, use a hairdryer to melt it away. But if you find it difficult for the first time, don’t try it.
For hand embroidery of letters on the cap, the process is virtually identical.
After copying the letters on the fabric, start stitching it as described above. Use a liquid sealant to seal it.
In all hand embroideries, make sure the threads are not loose, and the thread tension is maintained throughout the process.
Mistake to avoid during Hat Embroidery:
Caps and hats are difficult to embroidery if you don’t take care of certain things. There are few things to avoid during hat embroidery.
Running embroidery machine too fast:
To get the best embroidery results, the machine should run slow. A machine should run at 600 stitches per minute with a hat frame and 750 for a flat. If your system has some intricate details, your system should run slow. You can slow your system down to 550 stitches per minute to get the best results for more complex designs. Slowing down your system will enhance your results.
Improper hooping :
To keep the hat in good shape, hooping should be done tightly, and it should be in the center. Otherwise, it will affect the quality of the hat. Sometimes, embroidery has to be skewed so that the design or logo is seen on the front. This requires expertise and special instructions to embroiders and hoopers.
Ignoring thread tension:
It is a common mistake to forget to keep a check of the tension in the thread during embroidery. Proper tension will keep the stitches clean, and your overall quality will increase. This can be done by keeping a regular check over the embroidery, and also, the commercial machines used for embroidery can be set to keep the tension at a fixed and proper pace as well. The result of all of this that the letters, logos, and designs will look neat and clean.
Overlooking bobbins:
A bobbin is a splendor or cylinder over which a thread is wounded. During embroidery, every time the bobbin is switched, the thread tension should be checked because when the bobbin is changed, the thread may become loose, and neatness will decrease. So a fast and easy way to avoid it is to check the thread tension when you change bobbins.
Using the same needle repeatedly:
Although there are no hard and fast rules to change the needles repeatedly, a good habit is to check the needles frequently, at least once a week, and change them if needed. This quality check depends on several factors, such as the quality of needles used, the number of hours the machine is running, and the type of material used for embroidery. If the needle’s movement is not following the bobbin case’s speed, and there is a discrepancy in the timing, then this is the time to change the needle. Another problem encountered with the needle that can affect production speed is a bent needle, which can put scratches on the bobbin case. As a result, these scratches can produce burrs, and thread may break. So regular needle replacement is also required in these cases.
Imprecise placement:
It’s not a good idea to place designs too low on the cap, for instance, near the cap’s bill digitization specifications, not digitizing. This is because if we put the needle on the bill or the cap’s frame will crush the machine. To avoid this, the design or logo should be placed on the upper side of the cap.
Failure to digitize designs:
One of the biggest failures is not digitizing the design on the cap according to digitization specifications. Digitizing the design on a flat surface is very different from digitizing on a round cap. Only a professional digitizer can do this properly.
Embroidering a hat can be both profitable and fun. It can also become more accessible and convenient when you have a multi-needle machine and cap frame. One thing to pay attention to is hooping. And, as mentioned earlier, if hooping is not clear, the embroidery will also not be clear. So many of us seem to blame our embroidery machines for imperfections. But it’s not an embroidery machine; it’s usually the hooping that is the troublemaker.
Don’t forget to create designs that cover the front and sides of the hat. It would help if you looked forward to customer demands.use such designs which cover front sides and back sides.do not forget to follow bottom-up rules center forward( from bottom to crown ). Use proper software to make your dreams come true.