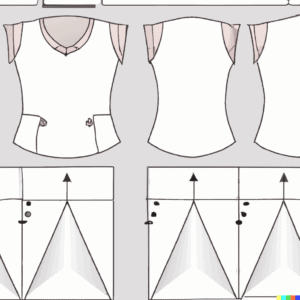
If you’re anything like me, you love to wear unique, one-of-a-kind shirts that are sure to be noticed and a great way to show off your personality and style. Whether you want to sew a shirt for yourself or as a gift, there are plenty of ways to make it unique. And, it’s not as difficult as you might think! With just a little bit of time and effort, anyone can sew a shirt. Here’s a step-by-step guide to help you get started.
Here’s what you’ll need
In order to sew a shirt, you will need a few supplies. If you are going use a sewing machine, some basic knowledge of your machine will be required. You can also sew your shirt by hand.
Supplies and Materials:
- A piece of fabric
- Thread
- A needle
- Scissors
- A sewing machine (optional)
Step by step guide: how do I sew a shirt?
Of course, you should already have some idea in mind about what kind of shirt you want to make. If you’re making a t-shirt, or some other basic style of shirt, then the pattern selection is going to be pretty straightforward. A pirate shirt with ruffles … not so much!
Regardless of what type of shirt you plan to make, these easy-to-follow steps should get you well on your way.
Step 1: Choose a Pattern
Again, find a pattern that you like. Some other popular patterns for shirts include button-downs, Henley’s, and polo shirts. But there are many different patterns available, so take some time to browse until you find one that you think will look good. Once you have the pattern, gather your materials. A sewing machine is optional. If you don’t have a sewing machine you can easily hand-sew the shirt, but it will just take longer.
To start, choose a shirt pattern that reflects your taste. If you’re not sure where to begin, look for inspiration online or in magazines.
Here are some sites I would recommend (I am not affiliated with any of these sites):
- burda Style
- Butterick (Something Delightful)
- McCalls (Pattern Review)
Once you’ve found a pattern you like, select fabric that complements it. Solid colors are always classic, but don’t be afraid to experiment with prints and patterns.
Step 2: Cut out the fabric
Cut out the pattern pieces from fabric. I trace off the pattern pieces onto brown paper or tissue paper. You will need the front and back yoke, the front and back bodice, sleeves, and collar.
If you unfamiliar with yokes and bodices, this may help.
Step 3: Sew the sleeves and neckline

When sewing the shoulder seams of the yoke and bodice together, you will want to make sure that the yoke is lined up with the bodice.
You will also want to make sure that the seam allowance is the same on both sides (a seam allowance, is the extra fabric that is sewn into the shirt to allow for alterations).
We want to attach the yoke to the bodice at the neckline
- First, fold down the facing at the shoulder seam, pinning it in place.
- Next, sew along the shoulder seam.
- Press to one side.
- Then, pin and sew the yoke to the bodice front, matching the center front seam of both pieces together.
Step 4: Sew the side seams
Sew the side seams of the bodice and yoke together. Then, pin the front and back yokes together, matching facing markings and armhole notches. Sew together, then trim seam allowances to 1/4″ (or 6mm).
Step 5: Hem the shirt
Next, we are going to sew a seam along the bottom edge of the shirt to finish it off.
Step 6: Set in the sleeves
To set in the sleeves, you would first sew the shoulder seams. Then, you would line up the sleeve with the armhole, right sides together, and sew them together. You would then repeat with the other sleeve.
Step 7. Attach the collar
One of the most important steps in sewing a shirt is attaching the collar onto the shirt at the neckline.
To start, you’ll want to press the seam allowance of the collar down flat.
Then, we’ll align the raw edge of the collar with the raw edge of the neckline and pin it in place.
Next, lets sew thecollar onto the neckline using a 1/2 inch seam allowance.
Be sure to backstitch at the beginning and end of your seam.
Step 8. Hem the sleeves
We saved this step for last because it is easier to hem the sleeves after the rest of the shirt is assembled.
We can also use the sleeve hem can be used to adjust the fit of the shirt.
Just sew a seam along the bottom edge of the sleeves once you’ve adjusted your fit perfectly.
Conclusion
Sewing a shirt is not as difficult as it may seem. With a little patience and the right supplies, anyone can sew a shirt. So, don’t be discouraged if your first attempt isn’t perfect. Although not part of the process of sewing a shirt, there is more you can do. You can hadd embellishments like embroidery, nifty buttons, or appliques that will take your shirt from ordinary to extraordinary. Be creative and have fun with it! So, grab some fabric and a needle and thread, and get started on your next sewing project.