Are you just getting started with your embroidery machine? Speed (going too fast before they are confident) and bobbin tension adjustment for your machine are the two most common issues we see when first getting started. Your bobbin is a spool (or cylinder) holding the thread that is wound onto the center post of your machine. That’s sounds complicated. But, the point is that you can adjust the tension on the bobbin to accommodate different fabrics.
You could easily end-up with a project that has loose stitches. Bobbin tension adjustment helps to ensure that embroidery stitches are uniform and symmetrical. Some machine brands use special tools to adjust the tension (some are more automated). Often, however, this is also done by just using simple household items. This guide will walk you through what you should know and how to troubleshoot common problems.
Bonus: I’ve added a video to this article that shows you how your design is affected by tension. On the machine featured in the video, you can easily adjust it right in the LCD panel.
Understanding Your Machine
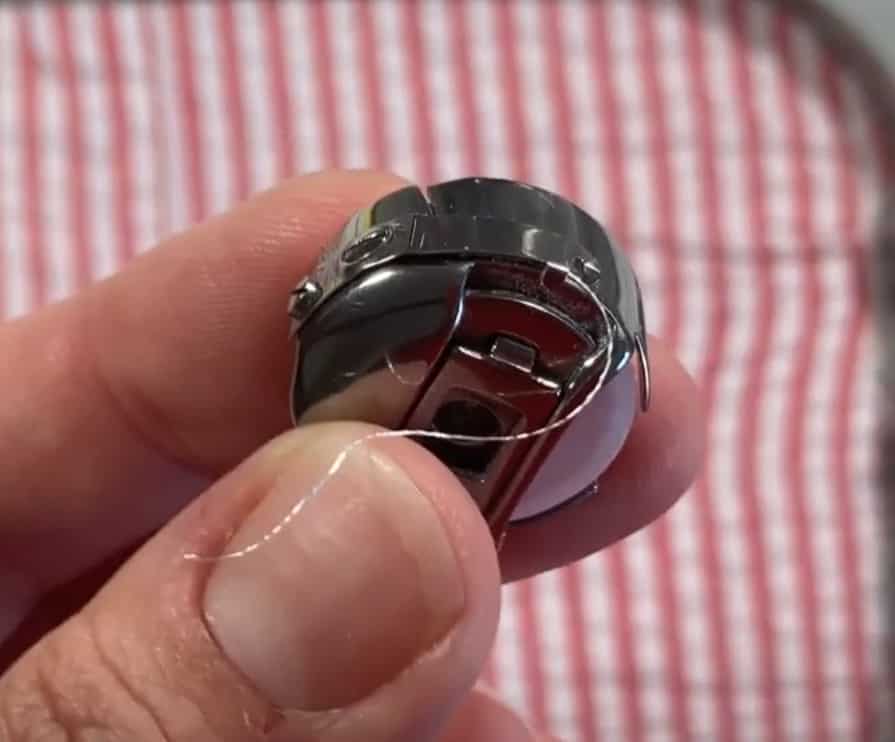
The thread guides are the metal devices on your machine’s right side. You’ll want to understand how these work to adjust your bobbin tensions properly. The bobbin thread goes through the two thread guides and should be centered in the middle. If it’s too far to either side, you can use a paperclip or safety pin to adjust it. The tension discs and regulator form a mechanical device that affects the tension in the upper thread. A bobbin should hold the tension until your project is finished, ensuring that stitches are secure.
Ensuring Tension is Your Problem
Bobbin tension adjustment problems are often due to the upper thread winding up too tight. This can create lumps in your stitch and make the stitches look loose. The tip of the upper line should be evenly spaced around the bobbin to ensure consistent stitches. You definitely need to adjust your machine’s bobbin tension if your stitches are pulling, skipping, or if the fabric is puckering up (the top thread is being pulled too tight).
Using a small swatch of fabric, I would try out your machine to see if you have tension issues. It’s possible that the problem you’re experiencing is not due to bobbin tension. So you really want to check other settings for your machine also. For example, sewing with a tight upper thread can cause skipped stitches or bunching in the fabric. If you’re using an embroidery hoop, just make sure that it’s placed around the material evenly. There shouldn’t be any extra fabric bunching inside.
Checking Your Bobbin Case for a Catch
Many tension issues often can be solved by simply removing your bobbin. Try setting it aside and removing any stitches hanging down from your fabric. Look to see if there’s a catch or hitch in the material. If you still have issues, you may need to check your dealer’s manual. If the bobbin is stuck in the case, this can also help loosen it up.
Adjusting The Upper Thread Tension
Your tension-regulating dial should be located on the upper part of most embroidery machines. This commonly along the top edge of the machine. You may need to open or remove a panel or case to access it. On some models, like the Brother PE800 Embroidery Machine you can adjust your tension directly in the LCD screen.
Bobbin tension is important because it ensures embroidery stitches are the same and secure. Manual machine need to loosen the top thread by 5–10 turns until there is some resistance—but not too much. Here is a great video that I think explains tension:
(I think Allan Wade gives a wonderful explanation of this)
If you are interested in the machine shown in this video then you may want to read our review of the Brother PE800.
